The Best Fluffy Pancakes recipe you will fall in love with. Full of tips and tricks to help you make the best pancakes.
How to Make a Cannabis Grow Room
So, you’re thinking about growing cannabis indoors, huh? That’s awesome! Growing your own weed at home gives you control over the entire process, from setup to harvest. But before you get started, you’ll need to build a proper indoor grow room. Don’t worry if you’re a newbie – I’ve got your back with this simple guide to creating the perfect space for your plants. Let’s jump right in!
Choosing the Right Space
First things first, where are you going to grow your cannabis? Whether you’re working with a small cupboard, a tent, or an entire room, your space will define how you build your setup.
Selecting the ideal location
Find a spot where you can control the environment easily. You could set up in a spare room, a closet, or a grow tent. Just make sure the footprint of your space matches the number of plants you want to grow. A large grow space is great, but if you’re just starting out, a small tent might be all you need.
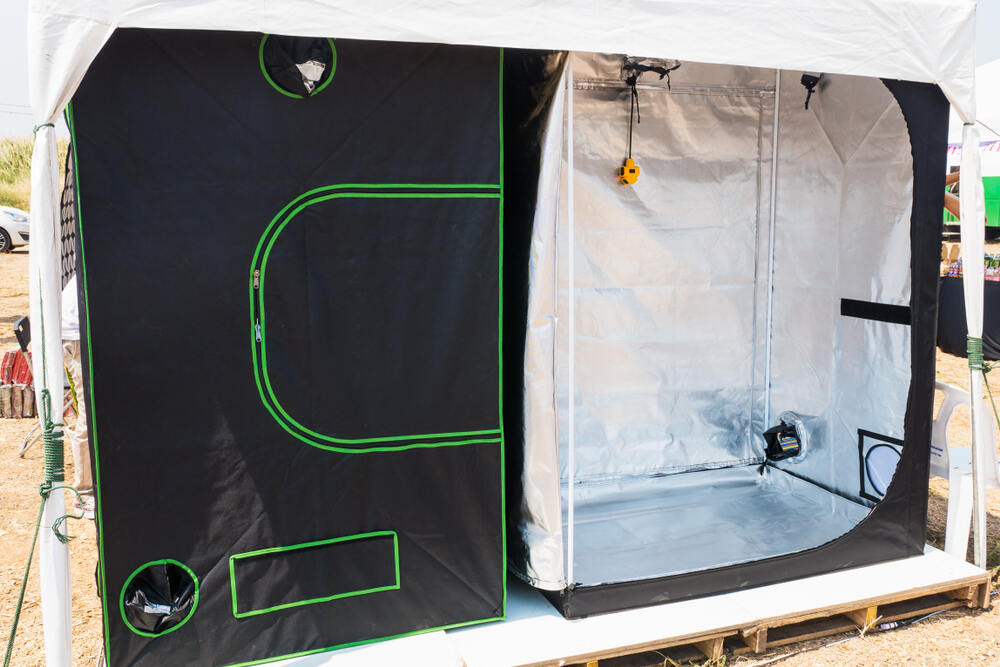
Managing space constraints (cupboards, grow tents, full rooms)
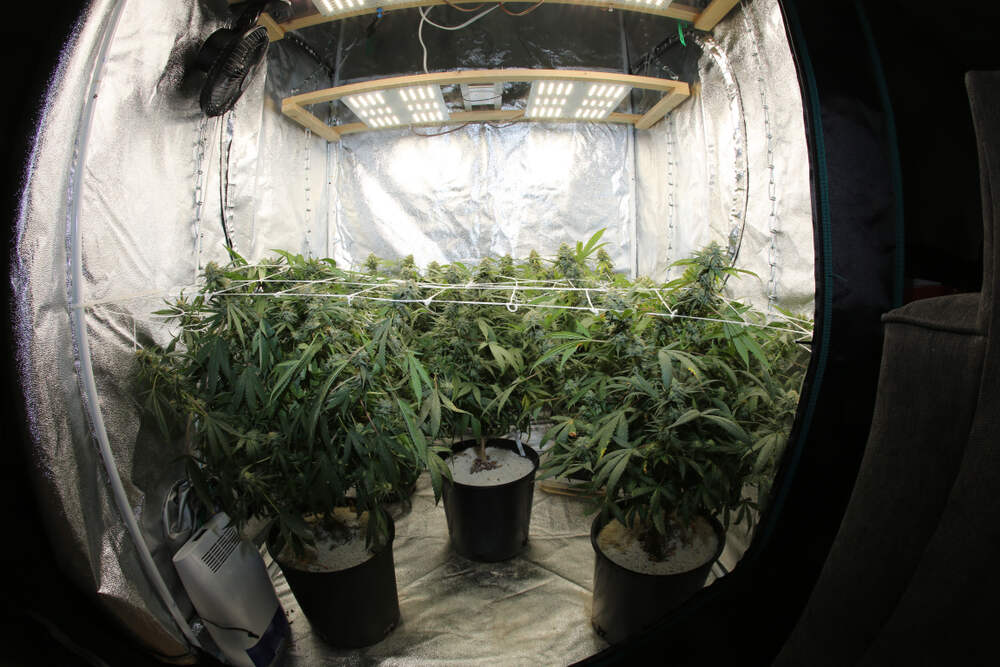
Each space has its ups and downs. A grow tent is a solid option for small setups since it contains everything neatly and is designed for an indoor garden. But if you’ve got room to spare, converting an entire room gives you flexibility and the potential for larger harvests.
Importance of access to power and water sources
You’ll need easy access to water and power. This is a must because your lights, fans, and other equipment will need electricity. Having a water source nearby makes watering your plants a breeze and minimizes mess.
Sound considerations for equipment noise
Indoor growing gear like fans and exhaust systems can be noisy. If you live with others or have neighbors close by, think about choosing a space where the sound won’t be an issue. You don’t want the hum of your garden keeping you up at night!
Flooring requirements for water and bacteria control
Avoid growing directly on carpeted floors. Carpets hold water and can breed bacteria. A waterproof floor or plastic sheeting is ideal for controlling moisture and keeping your indoor garden clean.
Controlling the Light Environment
Lighting is key to a successful cannabis grow. Your plants need the right kind of light and the right amount of darkness to thrive indoors.
Ensuring the room is light-tight
Light leaks are a no-go. If your grow room isn’t completely light-tight, light can creep in during the plant’s dark phase, which will disrupt the growth cycle. Use light-proof tape or covers to seal any cracks.
Using reflective surfaces (panda film, Mylar, or flat white paint)
Reflective walls help bounce light back onto your plants, maximizing your light’s effectiveness. I recommend panda film or Mylar, but flat white paint is also a good, low-cost option. The goal is to reflect as much light as possible to minimize wasted energy.
Choosing the right grow lights (LED, HID, CMH)
Picking the right light for your setup is crucial. LEDs are energy-efficient and don’t give off much heat, making them ideal for smaller setups. HID lights, like HPS and MH, are powerful but can generate a lot of heat, so you’ll need good ventilation. CMH lights are a happy medium, giving you a full spectrum of light and decent energy efficiency.
Setting up adjustable light systems to accommodate plant growth
As your plants grow, you’ll need to adjust your lights to keep them at the right distance. Use adjustable chains or pulleys to raise and lower your lights as needed. Make sure your plants get the full 18-24 hours of light during the vegetative stage and 12 hours of darkness when they move to the flowering phase.
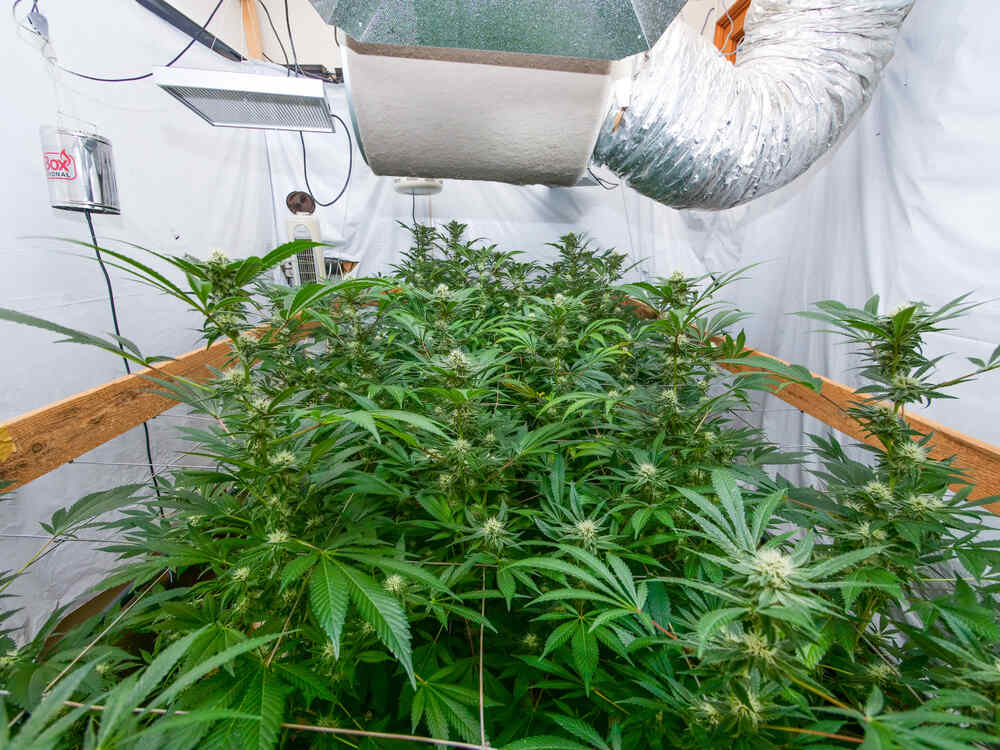
Ventilation and Climate Control
To grow cannabis successfully, you need fresh air circulating through your grow room and a stable environment. This keeps your plants happy and healthy throughout their entire life cycle.
Setting up ventilation systems to remove excess heat
Your lights will generate heat, so a good exhaust system is vital. Use an inline fan and ducting to pull hot air out of the room and maintain a steady temperature. Fresh air helps your plants grow strong.
Installing fans to ensure proper air circulation
A couple of fans in your room will help move air around, preventing hot spots and reducing the chances of mold. Place one fan at the canopy level and another near the floor to keep the air circulating evenly.
Controlling temperature and humidity with thermostats and hygrometers
A thermostat and hygrometer will help you monitor the temperature and humidity in your grow room. Keep things between 70-85°F during the vegetative phase and around 65-80°F during flowering. Humidity should be around 40-60%.
Using carbon filters to manage odors
Cannabis plants are fragrant, especially during flowering. To avoid making your whole house smell like weed, use a carbon filter attached to your exhaust fan. It scrubs the air before it leaves the room, keeping things discreet.
Dealing with humidity issues using humidifiers or dehumidifiers
Too much or too little humidity can stunt your plants’ growth. Use a humidifier if the air is too dry or a dehumidifier if it’s too damp. Keep an eye on those levels, and adjust as needed to create the perfect environment.
Setting Up the Grow Space
Once your environment is under control, it’s time to arrange your plants, pots, and other equipment. This part is all about maximizing your space and keeping things tidy.
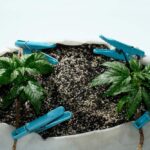
Planning your grow layout (number of plants, positioning, access)
Decide how many plants you want to grow and position them so they have room to spread out. You’ll need to leave space between pots for good airflow. A small footprint like 1 square foot per plant is a good starting point, but some strains might need more room.
Selecting pots, soil, or hydroponic systems
Growing in soil is beginner-friendly and forgiving, while hydroponics can yield faster growth if you’re up for the challenge. Choose a method that suits your space and experience level.
Using collection racks to manage airflow and cleanliness
Collection racks keep your plants off the floor and improve airflow around them. They also make cleaning up easier since you can see and remove any debris that falls beneath the pots.
Waterproofing the floor to prevent damage and increase humidity
Water spills will happen, so waterproofing your floor with plastic sheeting or a tray under your plants will protect your setup. This can also help increase humidity levels if needed.
Necessary Equipment and Tools
Here’s where we bring it all together. You’ll need a few key tools to ensure your plants get everything they need to thrive indoors.
Essential items (lights, timers, fans, carbon filters)
At the minimum, you’ll need lights, fans, a timer for your lights, and a carbon filter to control odors. These are the basics to get your indoor cannabis garden off the ground.
Recommended meters and tools (pH meter, thermometer, hygrometer)
A pH meter is essential for making sure your water is right for your plants, and a thermometer and hygrometer will help you track temperature and humidity. These tools will help you avoid common problems in your grow room.
Automating your system with timers and controllers
Timers are a lifesaver. Use them to automate your lights and fans to keep everything running on schedule. Controllers for temperature and humidity can also help you maintain the perfect growing environment without constant monitoring.
Ongoing maintenance and cleaning tips to prevent mold and pests
Keeping your grow room clean is crucial. Mold and pests thrive in warm, damp environments, so regular cleaning and maintenance are key. Sweep up fallen leaves, check for signs of pests, and wipe down surfaces to keep your plants healthy.
FAQ:
What is the best size for a cannabis grow room?
The ideal size depends on your space and goals. A small tent can house a couple of plants, while a full room allows for larger setups and bigger yields.
How do I ventilate my grow room?
Use an inline exhaust fan to remove heat and bring in fresh air. Ensure your grow space has intake vents low to the ground and exhaust vents higher up for good airflow.
What kind of lighting is best for cannabis plants?
LEDs are energy-efficient and run cool, while HID lights offer powerful growth. CMH lights provide a balanced spectrum for both vegetative and flowering phases.
How do I control the smell from my grow room?
Use a carbon filter in your exhaust system to remove odors before they escape your grow room. This keeps your setup discreet.
What’s the ideal temperature and humidity for growing cannabis indoors?
Aim for 70-85°F with 40-60% humidity during the vegetative phase, and lower both slightly during the flowering phase to boost growth and prevent mold.
Setting up your own cannabis grow room is an exciting journey, and with the right plan and gear, you’ll be well on your way to a bountiful harvest. Remember, every grow space is different, so adapt as you go, keep an eye on your plants, and most importantly – have fun with it! Happy growing!