The Best Fluffy Pancakes recipe you will fall in love with. Full of tips and tricks to help you make the best pancakes.

How to Dry and Cure Autoflowers
Drying and curing your autoflower harvest is where all your months of hard graft finally pay off—or get wasted. You can grow the stickiest, frostiest buds with textbook feeding and lighting, but if you rush or botch the drying and curing process, your final smoke will be harsh, weak, or even moldy. I’ve seen great runs ruined by impatience in this final phase. The good news? Drying and curing autoflowers isn’t complicated—it just demands the right setup, timing, and consistency. This guide walks you through exactly how I dry and cure my autoflower harvests for smooth hits, strong effects, and loud terpene profiles every time.
Why Drying and Curing Matter
The role of moisture removal in preserving potency and flavor
Drying is the process of slowly removing moisture from your buds. This is key because cannabis flowers contain a lot of water—anywhere from 60% to 80%. If you don’t reduce this properly, mold will thrive, and your buds will taste grassy or green. Drying also allows chlorophyll and other undesirable compounds to break down. The slower and more evenly you dry, the better the final taste and aroma.
Proper drying also preserves cannabinoids like THC and CBD. If you dry too fast using high heat, you risk degrading these compounds. If you dry too slowly, microbial growth can take over. Balance is the name of the game.
How proper curing enhances smoothness and terpene profiles
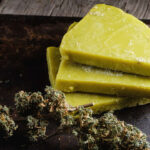
Curing takes dried buds and places them in a controlled environment where they continue to break down residual sugars, starches, and chlorophyll. This process refines your weed—it’s where the magic happens.
Curing does three main things:
- It smooths the smoke, making it easier on your throat and lungs
- It enhances the flavor by preserving and intensifying terpene content
- It stabilizes potency, allowing cannabinoids to mature and settle
Well-cured weed will always outperform rushed stuff in smoothness, taste, and effects. This is also the step where your grow starts to “jar up nice,” as we say—tight, aromatic buds with a good nose and clean burn.
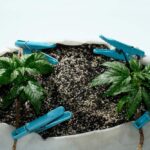
Preparing for the Post-Harvest Process
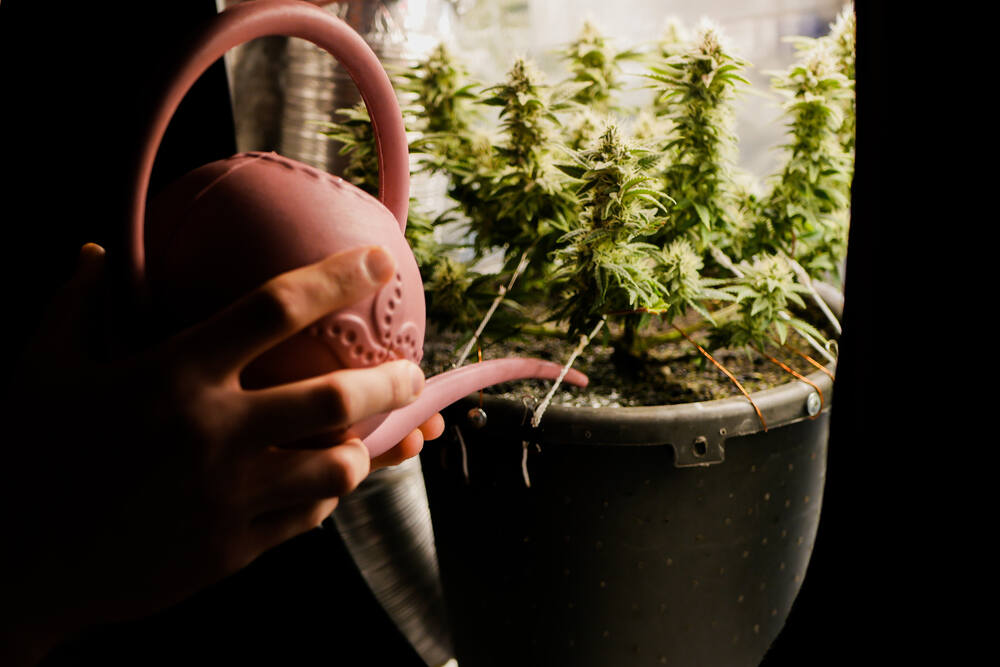
Flushing before harvest—timing and benefits
I always start prepping for drying about two weeks before harvest. That’s when I flush—meaning I stop giving nutrients and switch to plain pH-balanced water. Flushing encourages the plant to use up stored nutrients, which reduces harsh chemical residues in the final buds.
You should flush:
- 10–14 days before harvest in soil
- 7–10 days for coco
- 5–7 days for hydro
You’ll know flushing is working when fan leaves begin to yellow and fade—that’s the plant cannibalizing stored nutrients. This also helps your final cure taste cleaner and less metallic.
Assessing harvest readiness—trichomes, pistils, stem snap
To get curing right, you have to harvest at the correct time. I use a jeweler’s loupe to check trichomes. Here’s the rule:
- Clear trichomes = too early
- Milky/cloudy trichomes = peak potency
- Amber trichomes = more sedative, couch-lock effect
You also want most pistils to be brown and curled in—not sticking straight out.
If you’re unsure, snip a small branch, hang it for a couple days, and do the stem snap test. If it bends, it’s still too wet. If it gives a clean, audible snap, it’s ready to trim and cure.
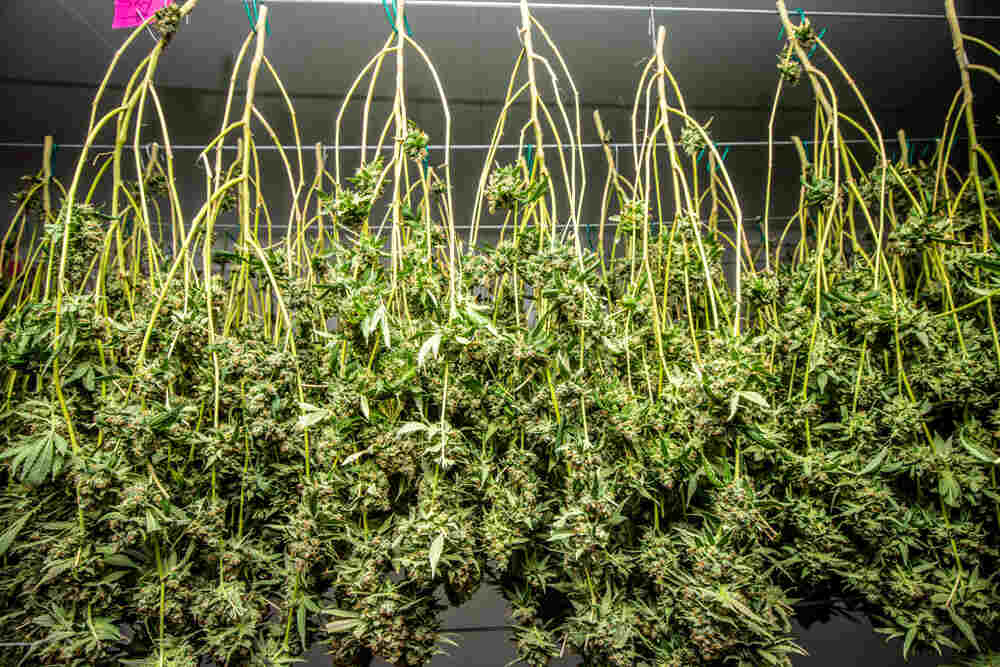
How to Dry Autoflowers
Choosing your drying method: hanging, racks, paper bags
Drying methods vary, but I prefer hanging whole branches. This slows down the process, allowing buds to dry evenly while retaining aroma. Here’s a quick breakdown:
- Hanging branches: Slower dry, great for terpene retention
- Drying racks: Faster dry, useful in humid climates or tight spaces
- Paper bag method: Old school but helpful in high humidity—buds dry inside bags in dark corners, reducing airflow slightly
If you use racks or bags, turn the buds regularly and check for mold daily.
Ideal environment—temperature, humidity, darkness, airflow
The drying room is where it all goes right—or wrong. Aim for:
- Temperature: 60–70°F (15–21°C)
- Humidity: 50–60% RH
- Darkness: Keep lights off to prevent THC degradation
- Airflow: Gentle, indirect airflow from fans—not blowing directly on buds
A small hygrometer in the room helps track conditions. You want to dry your buds over 7–14 days, depending on density and room environment. Slower is better.
Wet trim vs dry trim—pros and cons for autoflower buds
Trimming style matters, especially with autoflowers that sometimes grow small and dense. Here’s the lowdown:
Wet Trim Pros:
- Easier to cut leaves when wet
- Less risk of mold during dry (less plant mass)
- Buds look cleaner
Wet Trim Cons:
- Sticky mess, more trichome loss
- Faster drying—can overdry quickly
Dry Trim Pros:
- Better terpene preservation
- Easier to preserve bud structure
- Slower drying for smoother cure
Dry Trim Cons:
- Harder to trim crisp leaves
- Mold risk if humidity’s too high
Personally, I go for dry trim unless it’s summer and my room is humid.
Monitoring dryness—stem snap test and bud texture
The stem snap test is king. Grab a smaller branch and bend it—if it gives a crisp snap, not a bend, your buds are dry enough for the next step. Buds should feel dry on the outside but still a little spongy when squeezed.
If outer leaves flake off easily and buds aren’t sticking together anymore, you’re in the right zone. Don’t rush it—even if they feel dry after 4 days, give it at least 6–7 unless you’re in a super dry climate.
Manicuring and Initial Post-Dry Steps
When and how to trim sugar leaves—wet or dry
Once drying is done, it’s time to manicure your buds. I trim sugar leaves close but not too tight—you want to keep resin-covered tips if they’re coated in trichomes. If I dry trimmed, the leaves are brittle and easy to snip with sharp scissors.
Using precision tools to protect trichomes
Sticky buds need good scissors. I use:
- Curved tip trimmers for precision
- Gloves to avoid resin buildup on fingers
- A clean tray to collect fallen trichomes (keef gold!)
Never use dull blades—ripping buds damages trichomes, and that’s where the magic lives.
Collecting trim and sugar leaves for other uses (e.g., edibles, concentrates)
Don’t toss your trim. If your sugar leaves are frosty, they’re perfect for:
- Making cannabutter or coconut oil
- Dry sift or bubble hash
- Infusing into tinctures or topicals
I keep all trim in a jar in the freezer until I have enough for a batch.
The Curing Process: Step‑by‑Step
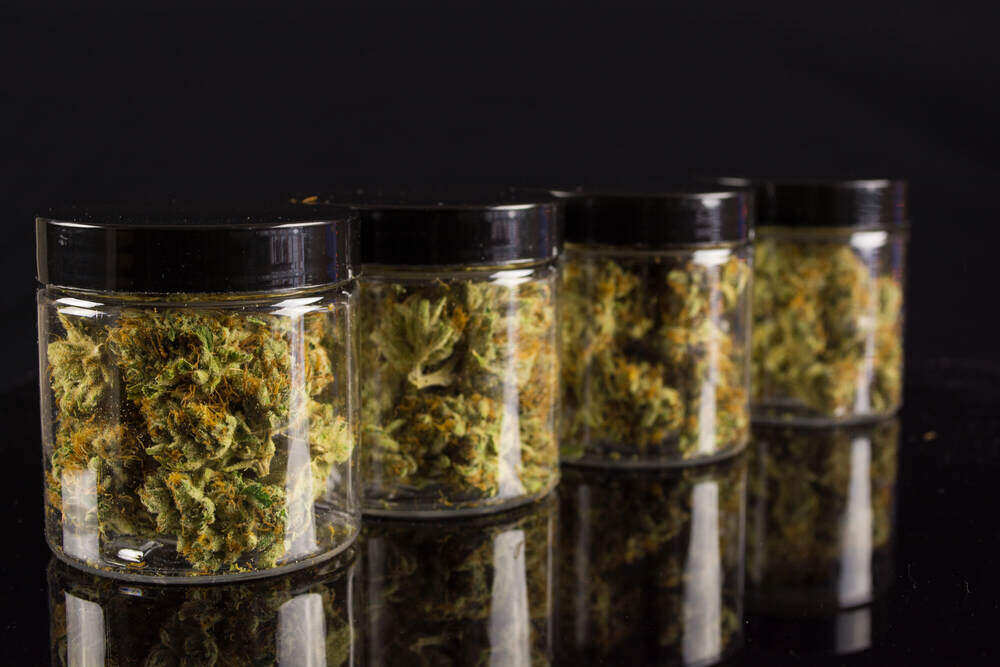
Choosing containers: glass jars vs Grove Bags vs plastic bags
I prefer wide-mouth mason jars (1-liter or quart size). They’re airtight, reusable, and let me monitor moisture. That said:
- Glass jars: Best control, great for small batches
- Grove Bags: Good for set-and-forget curing, maintain RH
- Plastic bags: Avoid unless they’re food-grade and smell-proof
Glass is king in my book because you can open, inspect, and re-humidify easily.
Jar loading—why leaving space matters
Never cram jars full. Fill them about 75% full so buds can breathe and moisture can redistribute evenly. Overfilling risks trapping moisture and encouraging mold. Shake the jar lightly—buds should tumble freely, not clump together.
The burping routine—frequency over time
Burping is opening the jar to release moisture and gas buildup. Here’s my schedule:
- Days 1–7: Open 2–3x daily for 10–15 minutes
- Days 8–14: Once daily
- Days 15–30: Every 2–3 days
After a month, buds should be stable, and you can move to long-term storage.
Optimal humidity ranges and using hygrometers or RH packs
Keep jars in the 58–62% RH range. Too dry = harsh smoke. Too moist = mold. Mini hygrometers help dial it in. If RH drops below 55%, I toss in a humidity pack (Boveda or Integra) to rebalance.
Common Mistakes and How to Avoid Them
Dangers of drying too fast or too slow
Fast drying kills flavor and aroma. Buds will smell like hay or grass. Slow drying in high humidity risks mold. That’s why steady conditions—60°F and 60% RH—are golden.
Over‑curing or under‑curing—impact on flavor and potency
Under-curing means leftover chlorophyll and green taste. Over-curing past 6 months without checking jars can lead to terpene loss and faded aroma. I recommend smoking samples every 2 weeks to track progress and get dialed in.
Mold, mildew, and off‑odors—prevention tips
- Always inspect buds before jarring
- Use gloves and clean tools
- If buds smell like ammonia or rot, toss them
- Spot mold? Remove the entire affected bud—don’t risk it spreading
Advanced Tips for Expert-Level Results
Extending cure for months—flavor benefits
Some strains—especially hazes and purples—get better over time. I’ve cured buds for 3–6 months and found they tasted smoother and smelled fruitier. Just make sure RH stays in range and check jars every few weeks.
Alternative curing methods (freeze-dry, water cure, sweat cure)
- Freeze-drying: Fast but expensive. Great terpene retention.
- Water curing: Buds soaked in water daily to remove impurities—fast cure but kills smell and taste.
- Sweat curing: Tropical method where buds are “sweated” in bundles. Risky without experience.
Stick to glass jars unless you’re experimenting or in a rush.
Storage best practices—long‑term freshness
Once cured, store jars:
- In a cool, dark place
- Upright, not stacked
- Away from heat sources or light
Vacuum-sealing is great for long-term storage, especially if you’ve got bulk flower. Just label jars with strain name and cure date—you’ll thank yourself later.
Conclusion
Drying and curing autoflowers is the final step that transforms your grow from decent to top-shelf. It’s not flashy, but it’s where great weed gets its signature flavor, aroma, and burn. Be patient, stick to proper temps and humidity, and give your buds the time they need to mature. If you treat your harvest right, your jars will reward you with smooth smoke and dank smell every single time. You’ve come this far—don’t let the final step trip you up.