The Best Fluffy Pancakes recipe you will fall in love with. Full of tips and tricks to help you make the best pancakes.
A guide to the autoflower flowering stage
The flowering stage is where all your patience, planning, and hands-on plant care finally start paying off. If you’ve been growing autoflowers, you already know they don’t need light cycle tricks to start blooming—they do it on their own timeline. But that doesn’t mean you can just sit back and watch the show. The flowering stage in autoflowers is fast, sensitive, and decisive. It’s when buds stack, pistils shoot, trichomes start forming, and you set the course for final potency, aroma, and yield.
As an experienced cannabis breeder, I’ve seen growers trip up at this stage too often—overfeeding, poor humidity control, or harvesting too early. This guide will walk you through every key part of the autoflower flowering stage. Whether it’s week 4 and you’re seeing pre-flowers, or you’re trying to time your flush before the chop, I’ve got you covered.
Understanding when autoflowers begin flowering
Timing based on genetic traits vs. photoperiod dependence
Autoflowers don’t wait around for a light cycle to trigger flowering. Instead, they’re driven by internal genetics inherited from Cannabis ruderalis, a species native to areas with short summers and unpredictable weather. This means autoflowers automatically switch from vegetative growth to flowering usually between days 21–30, depending on the strain.
This is different from photoperiod strains, which rely on a specific change in light exposure—typically 12 hours of light and 12 hours of darkness—to start blooming. Autoflowers, however, will begin flowering under any light schedule, including 18/6, 20/4, or even 24/0.
I recommend starting light feeding for bloom nutrients a few days before you notice pistils forming. Since flowering is baked into their timeline, your job is to prepare for it rather than trigger it.
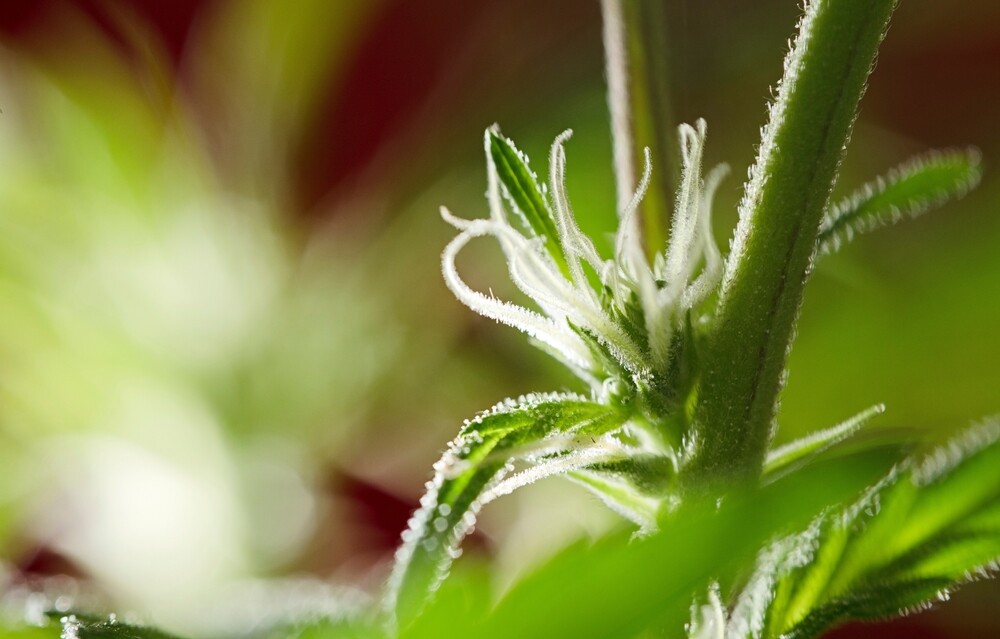
Identifying the first signs—pistils, calyxes and pre-flowers
The earliest visual signs of flowering in autoflowers are white, wispy pistils emerging from the nodes—usually between the fourth and sixth week from germination. These pistils are the first sign your plant is forming pre-flowers.
You’ll notice:
- Pistils: Fine white hairs sticking out where branches meet the main stem.
- Calyxes: Small, teardrop-shaped structures where pistils emerge.
- Stretch: A burst of vertical growth as the plant repositions its energy toward flower production.
This stage is your cue to start adjusting lighting, nutrients, and airflow to support the transition into full bloom.
Duration and phases of the flowering stage
Breakdown: early, mid, and late flowering timelines
The autoflower flowering stage typically lasts 6–10 weeks, depending on the strain’s genetic background and your grow conditions. I break it into three phases:
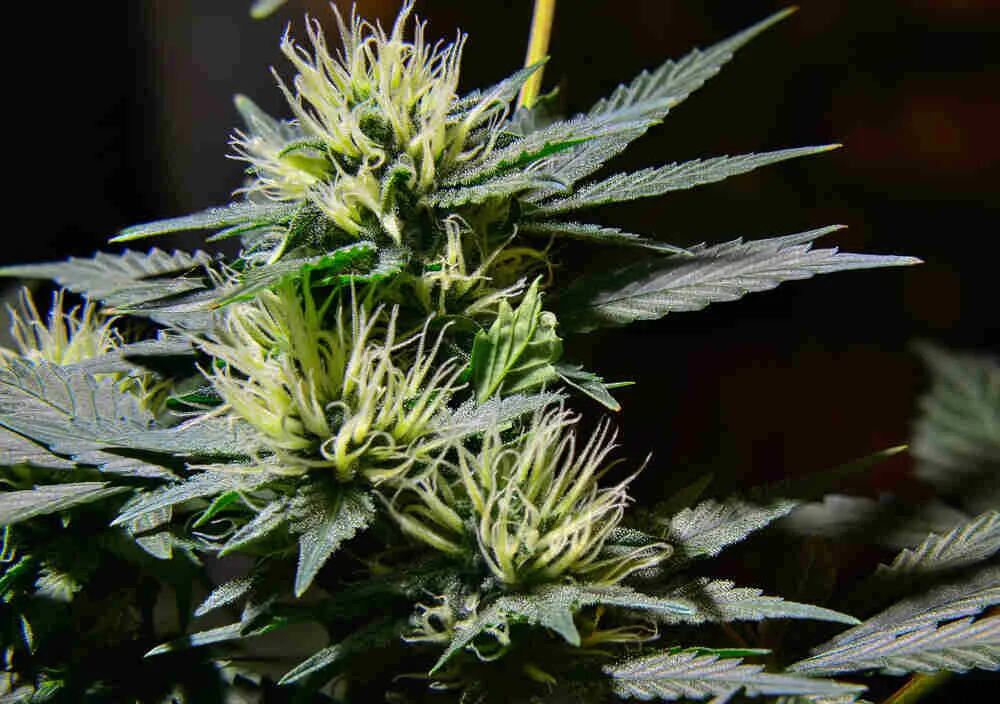
- Early Flower (Weeks 4–5): Pre-flowers form, pistils appear, and vertical stretch kicks in. Plants may double in height.
- Mid Flower (Weeks 6–7): Buds begin stacking and fattening, trichomes start forming, and scent becomes noticeable.
- Late Flower (Weeks 8–10): Buds ripen, pistils darken and curl in, and trichomes mature from clear to cloudy and amber.
These timelines can vary. For example, a fast-finishing strain like Skywalker OG Auto might be ready in 8 weeks from seed, while a more sativa-dominant cultivar might take 10–12 weeks total.
Typical length—6–10 weeks depending on indica/sativa dominance
Strains with heavy indica dominance typically flower faster—expect a total lifecycle of around 8–9 weeks from germination. These plants stay short, dense, and bushy with compact buds.
Sativa-dominant autoflowers, however, often stretch longer in both structure and timeline. Expect flowering to take 9–10+ weeks, especially with tall phenotypes that develop airier, more elongated colas.
Knowing your strain’s lineage is key. I always recommend checking the breeder’s suggested lifecycle window, but use it as a rough guide—not gospel.
How environmental factors can speed up or delay flowering
While autoflowers don’t need light shifts to flower, their environment still affects timing. Here’s how:
- Cold temps can delay flowering by slowing metabolism.
- High heat can stress plants and cause fox-tailing or stalled bud growth.
- Overfeeding nitrogen during early flower can keep plants in stretch mode longer.
On the flip side, a stable environment—18–26°C temps, 40–50% RH, consistent lighting—can keep flowering on schedule. Think of it like this: genetics sets the date, but environment decides if your plant shows up early, on time, or fashionably late.
Optimizing environment and lighting for flowering
Ideal light schedules and spectrum shifts for bloom stage
I’ve run autos under every light cycle, and for flowering I prefer 18/6 or 20/4 light schedules. This provides enough light intensity for bud development while allowing some rest. Going full 24/0 can work, but I find plants bulk out better with a rest period.
As for spectrum, I shift to a bloom-heavy light source with more red (660nm) and far-red (730nm) wavelengths during flowering. Red light promotes heavier flower growth and thicker colas.
If you’re using LED grow lights with adjustable spectrums, dial down the blue and bump up the red during weeks 4 onward.
Temperature and humidity targets during flowering
Get these dialed in during flower, and you’ll see tighter, frostier buds:
- Temperature: Keep daytime temps between 22–26°C and night temps no lower than 18°C.
- Humidity: Aim for 40–50% RH. Too high and you’ll risk bud rot. Too low and trichome production can slow.
I use a dehumidifier in late flower to bring RH down to 35–40%, especially when buds are dense and sticky.
Managing airflow and preventing mold in dense buds
Dense buds are mold magnets. Good airflow is non-negotiable during flower. I always:
- Use oscillating fans to keep air moving across the canopy.
- Defoliate inner leaves to open up space and light penetration.
- Ensure exhaust fans replace stale air every few minutes.
Watch for signs like damp smells or white fuzz between buds—those are early signs of mold and need immediate action.
Nutrient and feeding strategies during bloom
Transitioning to bloom nutrients—phosphorus and potassium focus
When flowering starts, I switch from a nitrogen-heavy veg formula to a bloom mix higher in phosphorus (P) and potassium (K). These elements support:
- Phosphorus: Bud formation and root activity.
- Potassium: Trichome production, resin buildup, and overall flower density.
I start bloom feeding at week 4, gradually increasing P-K levels while tapering nitrogen. Most autoflowers don’t need aggressive feeding, so I go ¼ to ½ strength of what photoperiods require.
Incorporating defoliation or low-stress training to boost bud growth
You can still shape your autos in flower—if you’re careful. Here’s how I do it:
- Defoliation: Remove large fan leaves blocking light from lower bud sites in early flower.
- LST (Low-Stress Training): Gently bend branches outward to open up the canopy.
Avoid high-stress techniques like topping after week 3. Autoflowers don’t have the recovery time photoperiods do.
Avoiding nutrient burn—feeding at ¼ to ½ strength
Autos are notoriously light feeders. Too much bloom food, especially early on, will cause burnt tips, clawed leaves, and slowed bud growth. I always recommend:
- Starting low—¼ strength and only increasing if the plant asks for it.
- Watching runoff EC/PPM to avoid buildup.
- Flushing with plain water if tips show signs of burn.
This conservative approach prevents locked-out plants and keeps flowering smooth.
Monitoring bud development and harvest timing
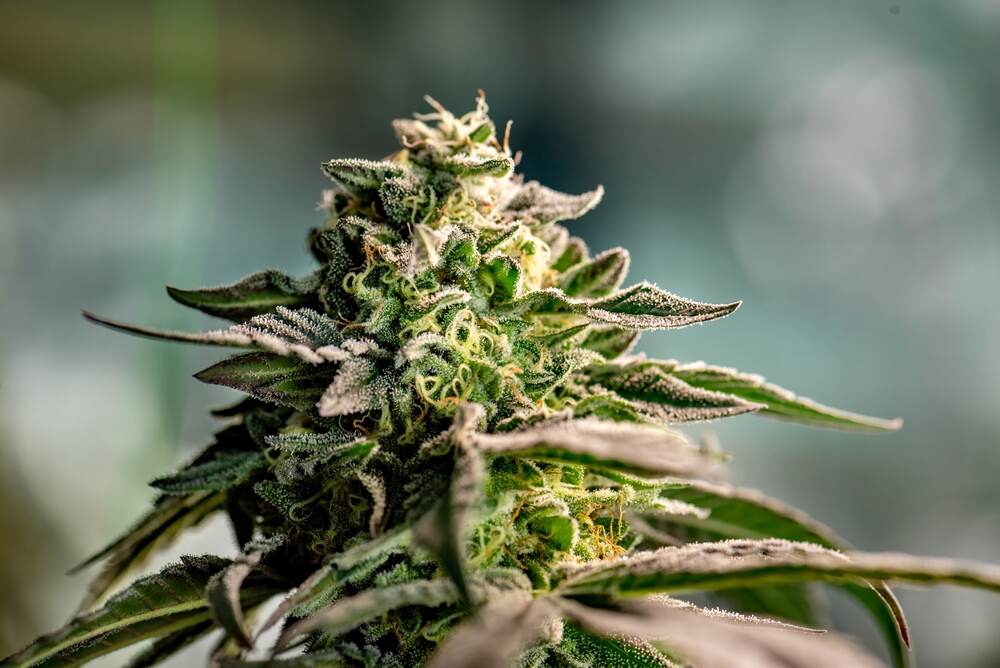
Recognizing full flower—white pistils, calyx swelling, sticky trichomes
Full flower is when your plant stops stretching and focuses on resin and bud development. Here’s what to look for:
- Pistils darken from white to orange or brown and begin curling in.
- Calyxes swell, and buds take on a denser, more defined shape.
- Trichomes become visible as a sticky, glistening frost.
This is the stage where aroma intensifies, and you’ll start seeing those terp-rich colas take form.
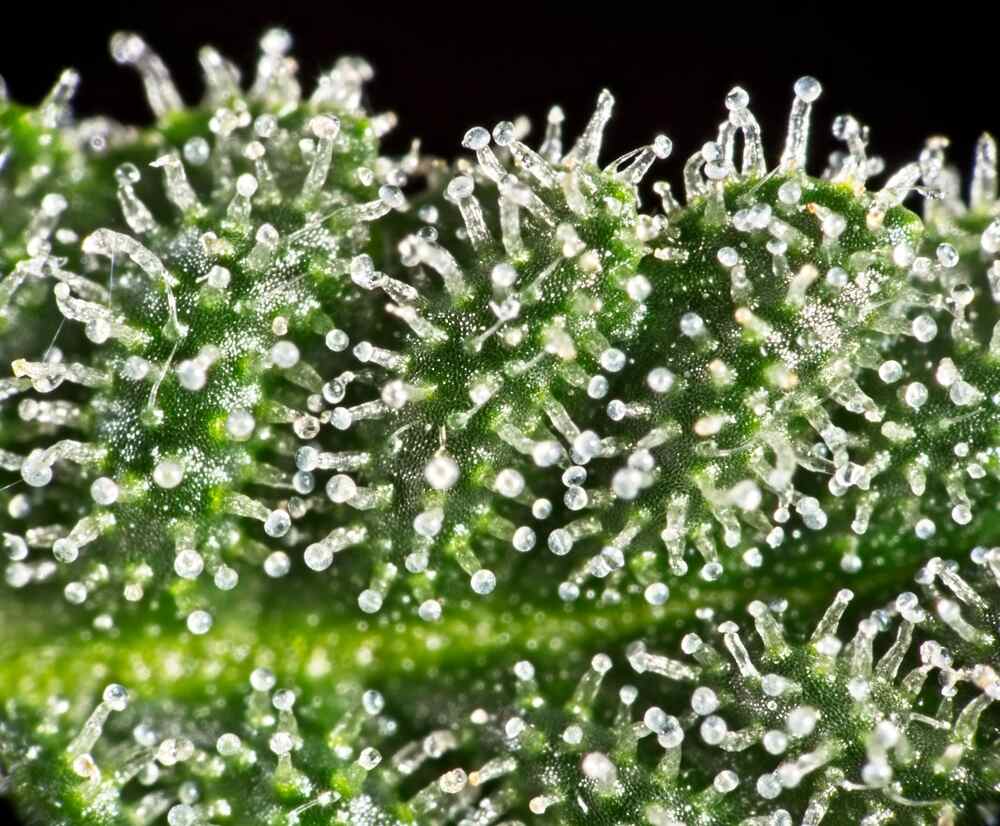
Trichome inspection—clear, cloudy, amber stages for potency decisions
Forget pistil color—trichomes are your best harvest indicator. You’ll need a jeweler’s loupe or digital microscope to inspect them up close. Here’s the breakdown:
- Clear trichomes = underdeveloped, weak potency
- Cloudy/milky trichomes = peak THC, energetic high
- Amber trichomes = degraded THC, more sedating high
For a balanced effect, I harvest when 10–20% are amber. For maximum punch, I go for mostly cloudy with a few amber. This window usually opens in weeks 9–11.
Final flushing, drying, and curing practices for quality yield
Two weeks before harvest, I flush with plain water (pH-balanced). This clears excess nutrients from the medium and leads to better taste and burn.
Once harvested:
- Dry buds slowly over 7–10 days at 18–21°C and 50% RH.
- Cure in glass jars for at least 2 weeks, burping daily.
Proper drying and curing is what separates harsh weed from smooth, aromatic flower. Don’t rush it.
Conclusion
The autoflower flowering stage might fly by compared to photoperiods, but it’s where your grow makes or breaks. From recognizing early pistils to dialing in light and nutrients, every detail matters. By monitoring trichomes, keeping your environment stable, and feeding lightly, you’ll produce top-shelf buds that punch above their size.
Stick to this guide, trust your genetics, and most importantly—pay attention to what your plants are telling you. That’s the key to nailing the flowering stage, every single grow.