The Best Fluffy Pancakes recipe you will fall in love with. Full of tips and tricks to help you make the best pancakes.
How Do You Know When to Harvest Cannabis?
Learning when to harvest your cannabis plants at the perfect moment is like picking the best fruit—timing matters. If you harvest your weed too soon, you’ll miss out on potency; too late, and your marijuana may lose its flavor and strength. So, how do you determine the perfect time to harvest? Here’s your guide to help you out.
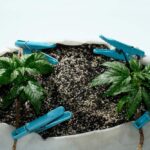
Understanding Cannabis Growth Stages
Before you can determine when to harvest, you need to learn about the different stages of your marijuana plant’s life cycle. Getting to know these stages will help you pinpoint when your plants are at their peak.
Vegetative vs. Flowering Stage
Cannabis goes through two main stages: vegetative and flowering. During the vegetative phase, the plant focuses on growing stems and leaves. It’s building strength for the big show—flowering. When it shifts to the flowering stage, the buds start forming, and that’s where the magic happens. Keep a close eye on the plant during this phase to determine when to harvest.
Importance of the Flowering Phase
The flowering phase is the most important stage to monitor. Your weed plant is now working on developing cannabinoids like THC and CBD. This phase can last anywhere from 6 to 12 weeks based on the strain. Learning to observe your plant carefully during this time will help you maximize its potency.
Key Signs Your Cannabis Is Ready for Harvest
The key to knowing when to harvest lies in paying attention to the plant’s visual cues. Let’s walk through two primary methods: the pistil method and the trichome method.
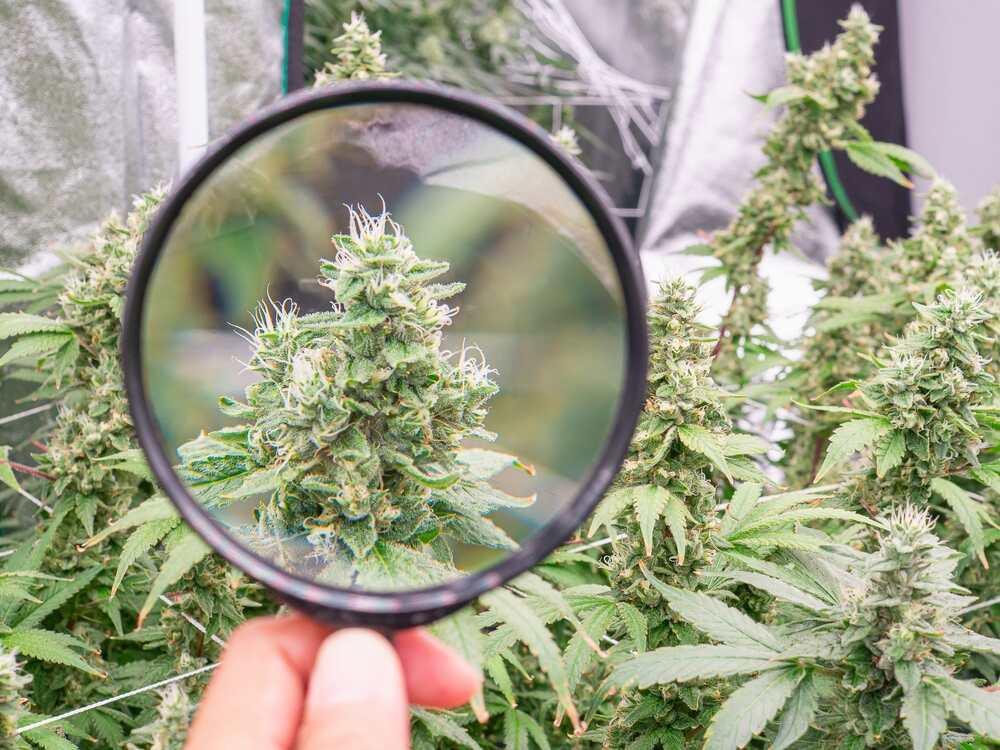
Pistil Method: Checking the Hairs
One way to know if your cannabis is ready for harvest is by looking at the pistils, the tiny hair-like structures on the buds. Early on, these pistils are white and straight. As the plant matures, they change color to orange, red, or brown and start curling in. When 70-90% of the pistils have darkened, you’re good to harvest for a balanced effect. If you want a more sedative high, wait until around 90-100% of the pistils have darkened.

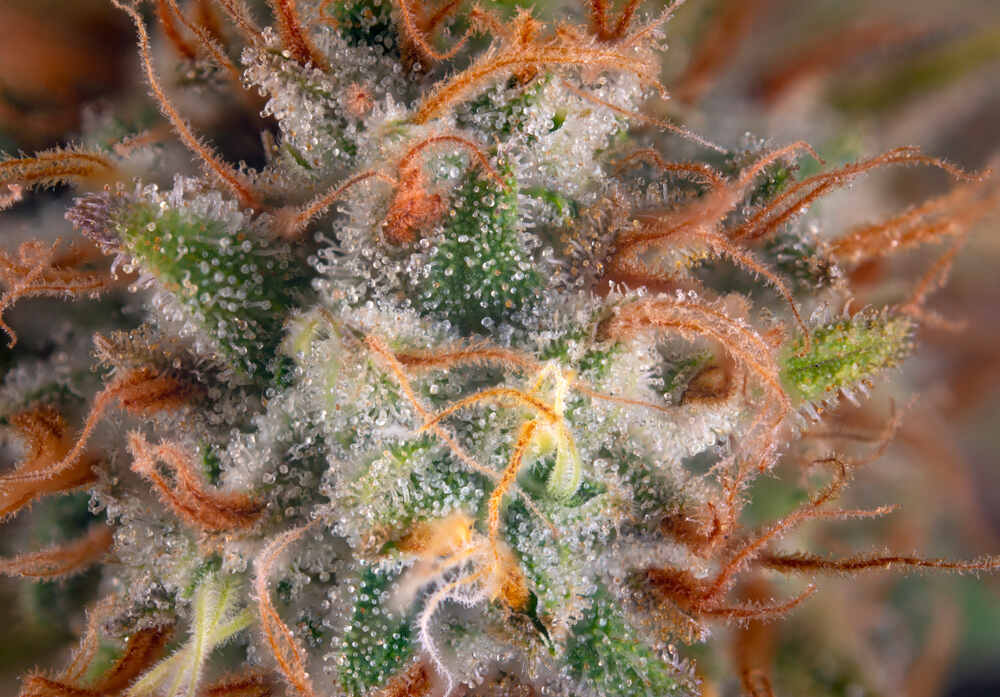
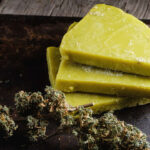
Trichome Method: Examining Resin Glands
The trichome method is one of the most accurate ways to determine the ideal harvest time. Trichomes are the resin glands on your buds that hold the precious THC. Use tools like a jeweler’s loupe or digital microscope to get a closer look. Clear trichomes mean your plant isn’t ready yet. You want most trichomes to turn a cloudy, milky white color for peak potency. If some of the trichomes have started to turn amber, it indicates more sedative effects.
Leaf Yellowing and Curling
As your weed plants approach harvest time, you’ll notice the larger fan leaves turning yellow and curling up. This is a sign that the plant is redirecting energy into the buds, another clue that harvest time is near.
Bud Density and Swelling
Touch those buds! As the flowering stage progresses, your buds should become thicker and denser. Once the growth of new white hairs slows down and the buds feel firm and swollen, your plant is almost ready for the big day.
Timing Your Harvest Based on Desired Effects
The timing of your harvest influences the type of high you’ll get. Here’s how to tailor your harvest based on the kind of experience you’re aiming for.
Harvest for Maximum THC (Energetic High)
For an energetic and uplifting high, harvest when 70-90% of the pistils have darkened and the trichomes are mostly cloudy. This is when your plant’s potency is at its highest, based on THC levels.
Harvest for More CBN (Sedative Effects)
If you want a more relaxing, couch-lock effect, wait longer. When 90-100% of the pistils are darkened and you see more amber trichomes, it’s time to harvest for a more sedative high. THC will have started breaking down into CBN, which creates the heavier, body-focused effects.
Tools You Need to Assess Harvest Readiness
You don’t need to guess when to harvest—there are simple tools to help you make the right call.
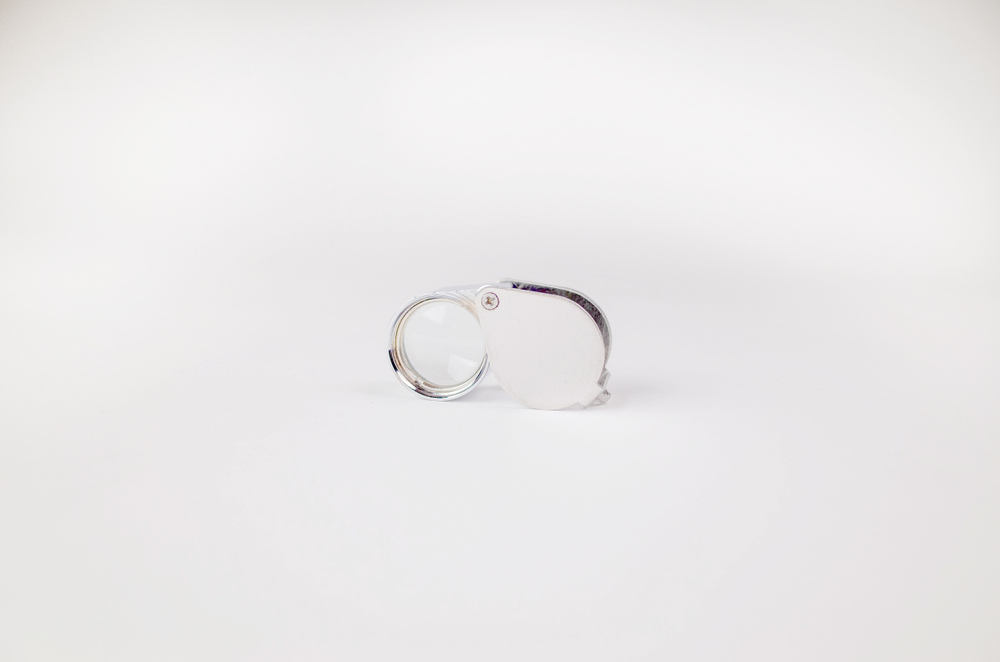
Using a Jeweler’s Loupe
A jeweler’s loupe is a small magnifying tool that helps you check the color of the trichomes. Look for one with at least 30x magnification. It’s inexpensive and does the trick for most home growers.
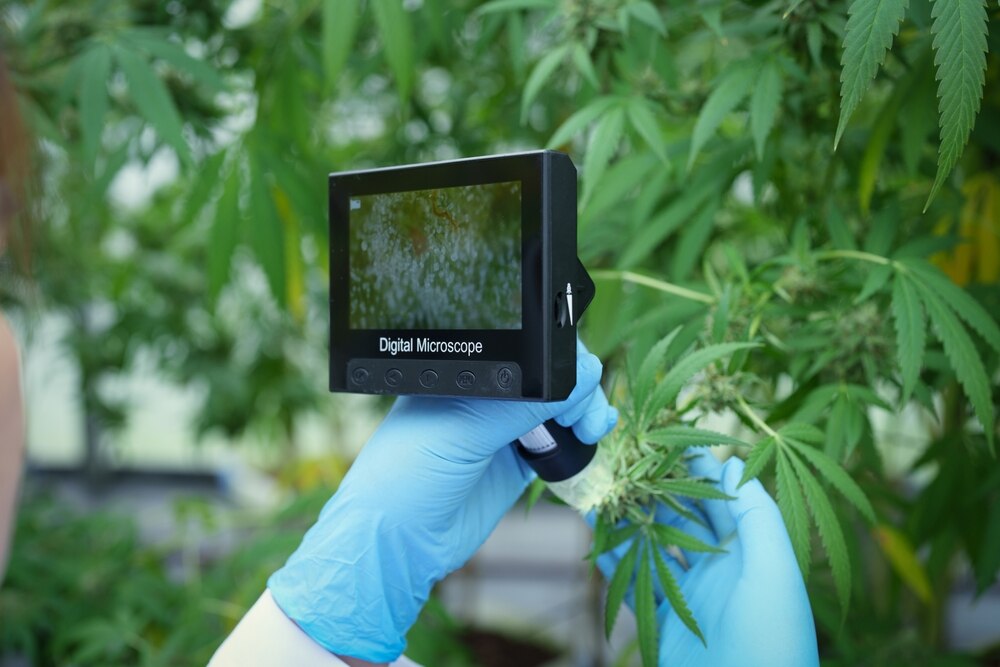
Digital Microscopes for Trichome Monitoring
Want to be more precise? Invest in a digital microscope. These allow you to see trichomes in high detail on your screen, making it even easier to determine when your cannabis plants are ready for harvest.
Common Harvesting Mistakes to Avoid
Let’s talk about a few things you don’t want to do. Avoid these common mistakes, and you’ll have a much smoother growing experience.
Harvesting Too Early
Don’t be impatient! Harvesting your weed too early can lead to less potency, weaker flavor, and a harsher smoke. Let your plants fully develop those trichomes before chopping.
Harvesting Too Late
Waiting too long can also mess up your yield. If you delay too much, the THC will degrade into CBN, resulting in a more sedative and less potent high. Timing is everything!
Post-Harvest Considerations
Once you’ve harvested your buds, there’s still work to do. Properly drying, curing, and storing your weed ensures it stays fresh and potent.
Drying and Curing
After harvesting, hang your buds upside down in a dark room with good air circulation to dry for 7-10 days. Once dry, cure them by placing the buds in airtight jars, burping them once a day for the first couple of weeks. This slow curing process helps develop the best flavor and smoothness.
Proper Storage for Preserving Potency
Once your weed is dried and cured, store it in airtight containers in a cool, dark place to maintain potency. Avoid light, heat, and moisture, which can degrade your buds over time.
FAQ
How do I know if my cannabis is ready to harvest based on pistils?
When 70-90% of the pistils have darkened and curled in, your cannabis is ready for a balanced THC high. For a more relaxing effect, wait until 90-100% of the pistils have darkened.
What color should trichomes be when harvesting?
Trichomes should be mostly milky white for the best THC content. A mix of amber and cloudy trichomes will give a more relaxing, sedative high.
What happens if I harvest my cannabis too early?
Early harvest results in weaker potency, less aroma, and a harsher smoke. Buds will be smaller and not as potent in THC or terpenes.
How can I increase THC content at harvest?
Harvest when trichomes are mostly milky white and pistils are 70-90% darkened. This timing provides the highest THC levels in your buds.
Should I flush my plants before harvesting?
Yes, flushing with plain water 1-2 weeks before harvest helps remove any leftover nutrients, improving the taste and smoothness of the final product.
Learning to harvest your cannabis at just the right moment takes practice, but with the right tools and methods, you can ensure maximum potency and flavor. Keep a close eye on the pistils, trichomes, and overall plant health to make the most of your marijuana harvest. Trust me, with time and experience, you’ll get better with each grow!


This is very helpful information. About thirty-five years ago I had fifth generation plants and eventually came up with an awesome strain that no-one could get enough of. It was tedious to pollinate only the buds you wanted seeds from. Back then you couldn’t buy guaranteed female seeds so you had to start inside, late winter, and sex the plants by adjusting the lights. Any way, I was still able to learn a few things from reading your post and I appreciate it! Another week or so and I’ll be starting to select the perfect tops. Thank you!! Randy
I have had trouble for years trying to get the perfect bud thank you for your information, I do believe I will have the perfect bud this year due to this article. And let me in by saying…..HIGH!!
EXELLENT INFORMATION , IM GLAD I FOUND THIS SITE , THANKS